In the Aftermath of the Mini Maker Faire

The dust is settling now after the hordes of people who wandered through the halls of the Elephant & Castle Mini Maker Faire.

Within the halls of the London College of Communication, makers were separated by categories into different studios. We had lots to look at and admire, however Raspberry Pi’s and 3D printers, not surprisingly took centre stage.

I don’t intend to talk about everything that happened, just a few things that really made an impression on me.

One 3D printer that caused me to take a second glance, and a third, and a fourth, and a chat with the creator, was the 3DR.
The 3DR is an inverted delta-bot style 3D printer that is constructed mainly out of 3D printed parts. Because of the simple design it seems to me that it must be must easier to set-up initially as the only areas you need to focus on are how tight the strings/cam belt are, and the position of the 3 arms, of course that is only the case if the rod guides are all the same height and parallel to each other.

A 3D printing company caught my eye as we wandered around because of their impressive printed objects and nicely build RepRap printers. Active 3D is based in Tunbridge Wells and aim to help introduce schools in the area to the opportunities that are available in 3D Printing. They offer workshops and monthly meetups which aim:

  • To train people in how to use 3D printers.
  • To train people how to maintain a 3D printer.
  • To provide an easy to use instruction manual.

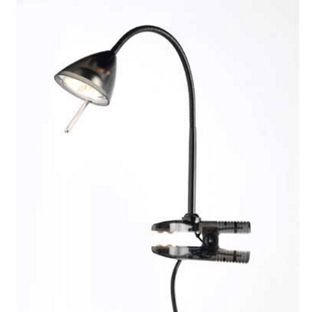
And finally, catering to the more artistic of us, and the thirsty, the Tropism Well could be found in one of the main halls.
The Tropism Well is a drinking fountain with a difference. With a base made up of a 14 litre tank, which can be filled with any beverage, the Well automatically detects the presence  of a person and elegantly bow’s its neck, presenting to the honoured person a gift of a perfectly poured serving or a drink, before bringing its neck back up straight as if to observe you enjoying its gift.

London Arduino

Tonight was my first time along at the London Arduino Meet Up.
The London Arduino Group is of a similar idea to the Raspberry Pi Jam events that I’ve been to
before. It is a group of people who want to share knowledge about the Arduino platform and start to
innovate across other platforms.

This month we had presentations including hobby electronics, internet controlled LED’s and 3D
printing.

Using an Ethernet shield, Christian, put together a set up where he was able to control the status
of an LED in his web browser. This was done on a local network (sorry guys who wanted to take
control of his little light) where he showed two methods of flicking the switch.
The first method he showed off was to use the arduino as a web server and construct the html on it
as well. Then it was a simple matter of connecting to the IP address that was defined on the
arduino and hey-presto it worked.
The second method that he demonstrated was a little more complicated involving node.JS, sockets and other technical jargon that I didn’t catch.

On a similar vein we had Liam demonstrating the use of a TP-Link Wireless N Nano Router (TL-WR702N) to connect an arduino to the internet. He argued that the use of WiFi shields is overly complicated compared to Ethernet shields, as well as being a lot more expensive  So if you are willing to have a slightly bigger package then you can connect the Ethernet shield to the nano router and leave that to sort out the complicated subtleties of wireless connections, allowing you to get on with innovating your wireless solution. Another thought is that a nano router is much more versatile than a WiFi shield because it can be plugged into a computer, games console, Raspberry Pi, or any other device that has an Ethernet socket.

In the realm of Hobby Electronics we had Danny, who was plugging his first ever kit robot. Orionrobots.co.uk is his creation and is where he is selling his first his own starter kit robot. In this kit you will find everything that you need to to construct a small chassis with 4 wheels controlled in pairs (left and right) by a L298n dual H-Bridge controller board which is interfaced to an Arduino Uno R3 (provided in the kit). With a easy fit design, you only need a screwdriver to put this kit together making it perfect for anyone who is; unsure with tools, in need for a robot chassis quickly, or just lazy.

The final talk of the evening was from Mark, on behalf of another London Tech Meet-up group, Future Manufacturing, who have a keen interest in 3D printing. They are really keen to see cross collaboration between our two groups on various projects including potentially the Luma Module Interactive Spaceship. The Luma Module is a KickStarter project where they want to build a spaceship that lights up when people interacts with it. This spaceship will then be shipped (no it won’t fly itself) to Nevada for the Burning Man art Festival at the end of August 2013.

Modding a Lamp

What what can you do with a £6 bendy neck lamp with a clip on the end of it?

the £6 lamp

Inspired by this YouTube video, I decided to take one and try and turn it into a flexible camera mount. Rather than in the video where he adds his own clamp I decided to just just the lamp’s clamp just because its easier and I lack the tools to drill the appropriate holes.

T bone

From the local hardware center I brought myself a T bracket and a M6 bolt which is perfect for the tripod mounting hole on cameras. On the bracket I also stuck down two rectangles for foam to help avoid scratching the bottom of the camera. 
Bolt

A short bolt was used to secure the T bracket onto the neck of the lamp.  This was done with a small section of rubber tubing wrapped around the bolt, and a nut under it. When the bolt is rotated the nut travels up the bolt, compressing the rubber and securing the T bracket in place.
Bendy neck

With the camera
With the Camera - 2

If I was to make one again I would improve it by using my own larger clamp, and making every effort to make the top section as light as possible.
This was a great little project and only cost me around £8.